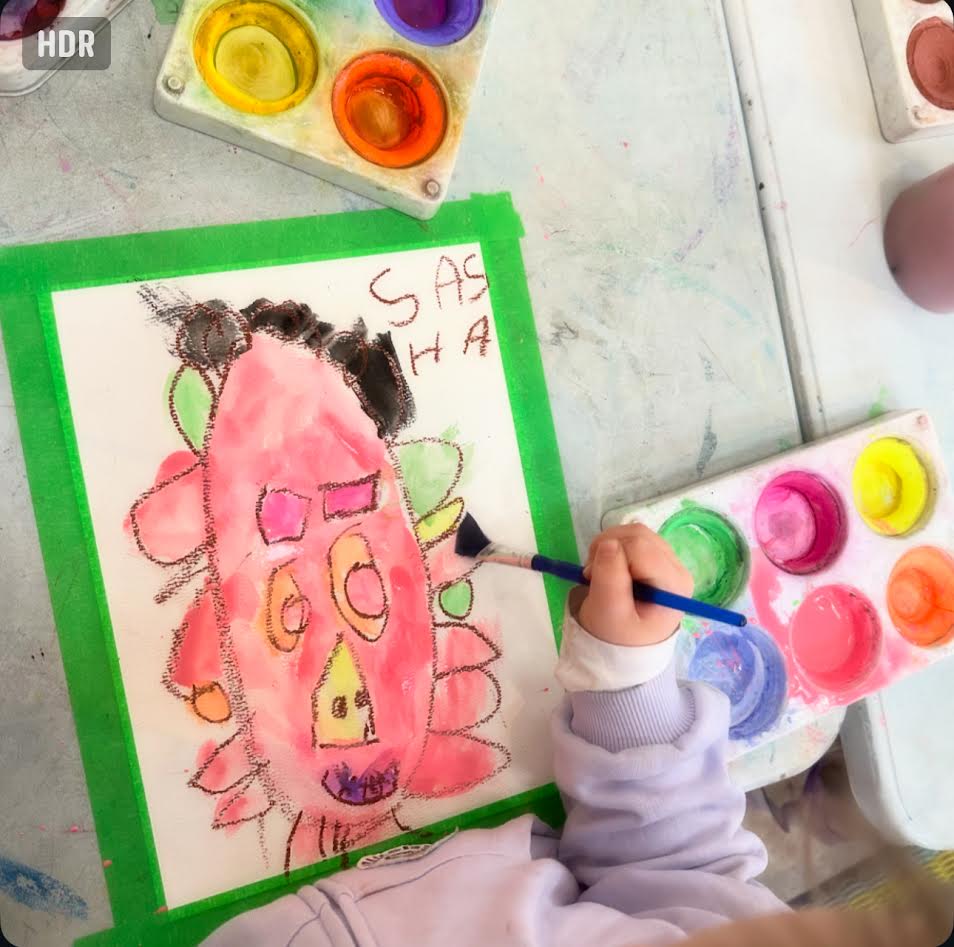
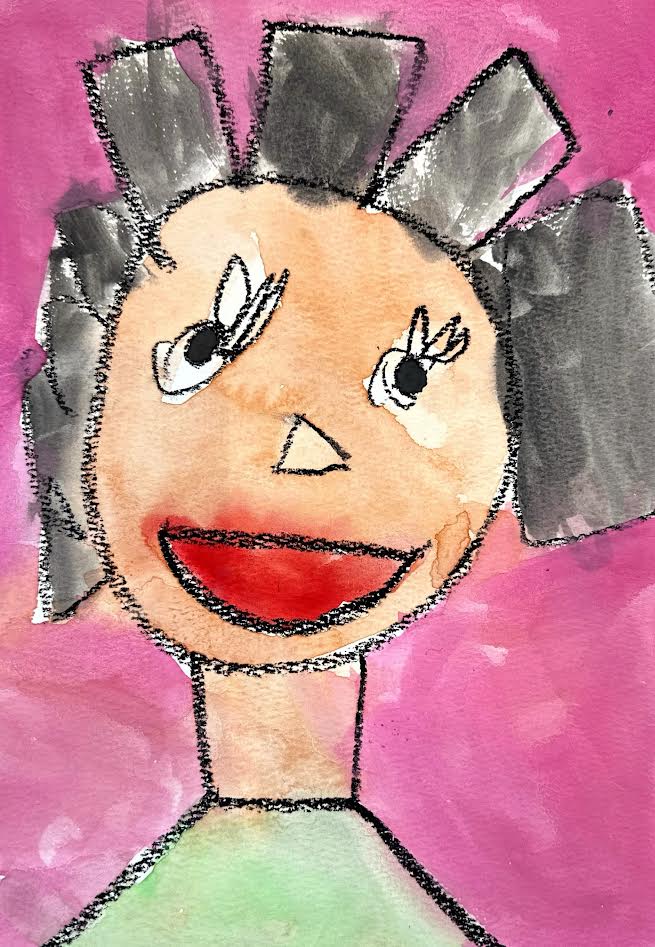
Starting a drawing with basic shapes like circles, squares, triangles, and lines helps kids learn the foundations of art because it makes big, complicated things feel simple and manageable. When children see that a face can begin as a circle, a body as a rectangle, or a tree as a combination of triangles and ovals, they start to understand how real-world things are built and structured. Working this way builds confidence, improves observation skills, and strengthens hand-eye coordination, while also giving kids a clear framework they can play with, change, and personalize as their creativity grows. Tip: for the wee ones (ages 4–6), we have children make their initial drawing with a wax crayon, while older kids use a coloured pencil — this prevents smudging from lead pencils and keeps a light, clean sketch as a guide for painting. For paint, we work with tempera paints, watercolour, or gouache.

Lesson Plan: From Shapes to Stories — How Kids Learn to Draw
Age Group: Recommended for ages 4–10 (with adjustments noted for younger/older children)
Time:60–90 minutes
Learning Goals:
- Children understand that complex images can be built from simple shapes.
- Children gain confidence in drawing by using shapes as a foundation.
- Children practice careful mark-making and basic painting techniques.
- Children develop observation, fine motor skills, and creative thinking.
Materials:
- Drawing paper (with a smooth and grainy side)
- Sharp pencils
- Oil pastels (for ages 4–6)
- Coloured pencils (for older children)
- Tempera paint, watercolour, or gouache
- Paintbrushes, water, and palettes
- Paper towels
- Green painter’s tape (Home Depot type)
Book Inspiration (Read-Aloud with Clear Shape-Based Illustrations)
Choose one of the following to begin the lesson:
- “The Snowy Day” by Ezra Jack Keats — simple geometric shapes and bold colour.
- “Mouse Paint” by Ellen Stoll Walsh — clear circles and colour exploration.
- “Harold and the Purple Crayon” by Crockett Johnson — drawing built from basic lines and shapes.
- “My Many Colored Days” by Dr. Seuss — expressive use of shape and colour.
- “Little Blue and Little Yellow” by Leo Lionni — simple shapes that transform and interact.
- “City Shapes” by Diana Murray — everyday objects shown as basic shapes.
Discuss briefly: What shapes do you see? Where do you see circles, squares, triangles, or lines?
Step-by-Step Lesson
1) Prepare the Paper
- Have each child write their name on the back of the paper at the top using a sharp pencil.
- Remind them to press lightly.
2) Set Up the Drawing Surface
- Turn the paper over so the grainy side is facing up (this is the “right” side for drawing and painting).
- Tape all four edges of the paper down evenly with green painter’s tape so the paper stays flat while painting.
3) Guided Drawing Using Shapes
Demonstrate slowly at the front so children can follow along.
Choose one focus (pick one per class):
- Face
- Whole person
- Animal
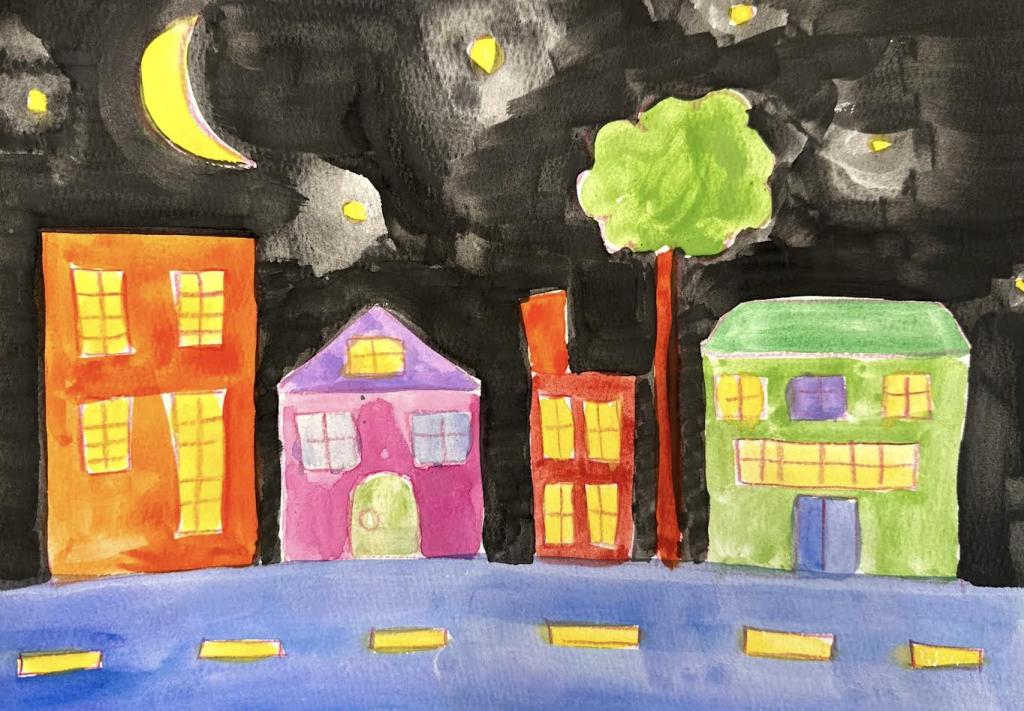
- Cityscape
- Landscape
Break it down into shapes as you draw:
- Face = circle (head) + small circles (eyes) + triangle/line (nose) + curved line (mouth).
- Person = circle (head) + rectangle (body) + lines (arms/legs).
- Animal = ovals and circles combined.
- Cityscape = rectangles (buildings) + squares (windows) + triangles (roofs).
- Landscape = triangle (mountain) + circle (sun) + wavy lines (hills).
Outlining materials:
- Ages 4–6: use oil pastel for outlines.
- Older kids: use coloured pencil for outlines.
Explain that the outline is just a guide — it doesn’t need to be perfect.
4) Painting Demonstration
Give a short demo on:
- Holding the brush properly.
- Using gentle, even paint strokes.
- Rinsing the brush between colours.
- Mixing two colours to make a new one (e.g., yellow + blue = green).
- Differences between tempera, watercolour, and gouache (very simply: thick vs. watery).
5) Paint the Full Picture
Children paint:
- Their shapes (face/person/animal/city).
- The background (sky, grass, room, streets, etc.).
Encourage them to think about:
- Light vs. dark colours.
- Filling spaces carefully.
- Taking their time rather than rushing.
Wrap-Up Discussion (2–5 minutes)
Ask:
- What shapes did you use?
- Was anything easier to draw when you thought of it as a shape?
- What colours did you mix?